

Steps to Disassemble a Reclining Sofa Before a Move
Posted on: Tuesday, November 25th, 2025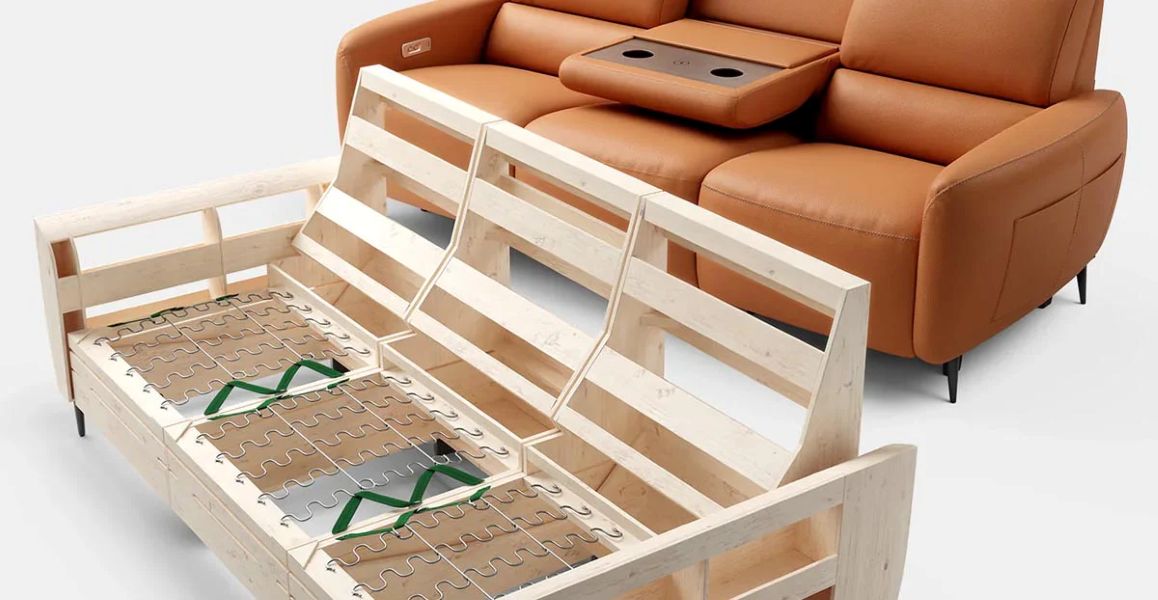
Moving a reclining sofa can be tricky without proper disassembly. Even the best moving company in Richmond will appreciate it when you break down your furniture correctly before the big day. This guide walks you through each step to safely take apart your reclining sofa. You’ll need some basic tools and about an hour of your time. Follow these instructions to make your move smoother and protect your furniture from damage.
Gather Necessary Tools
Start by collecting all the tools you’ll need for this project. Grab both Phillips and flat-head screwdrivers to handle different screw types. Keep needle-nose pliers nearby for removing stubborn staples or small components. A rubber mallet helps with gently tapping parts loose or into place. Have a flashlight ready to see inside dark areas of the sofa structure. Lay down a blanket or moving pads to protect your floor and furniture during the move. With these tools ready, you can tackle the disassembly efficiently.
Remove the Backrest
The backrest comes off first, so locate all the screws connecting it to the frame. Use the appropriate screwdriver to remove each screw while supporting the backrest with your other hand. Keep all screws and fasteners in a labeled bag so you don’t lose them. Once you’ve removed all screws, lift the backrest straight up and away from the frame. If your sofa has electrical components for power reclining, disconnect those carefully before fully removing the backrest. This step sets you up for easier access to the other components.
Detach the Reclining Mechanism
Look underneath the sofa to find the bolts or screws holding the reclining mechanism to the frame. These typically require an Allen wrench or screwdriver to remove. Take out each fastener and place it in your labeled bag. Gently lift the mechanism away from the frame once all connections are loose. Don’t force anything apart; this could break important parts. With the mechanism removed, the sofa becomes much lighter and easier to handle.
Take Apart the Armrests
Check each armrest for visible screws or fasteners connecting it to the sofa frame. Some armrests hide screws under fabric or covers, so examine them thoroughly. Remove all screws with your screwdriver and place them in your hardware bag. Lift each armrest upward to disconnect it from the frame. If your armrests use a locking mechanism instead of screws, find the release tabs or buttons and activate them according to your sofa’s design. Repeat this process on both sides. Removing the armrests makes the remaining frame more compact for moving.
Disassemble the Seat Cushions
Flip the sofa onto its back or side to easily access the seat cushions. Most cushions attach with Velcro, zippers, or hand-release clips. Carefully detach these fastenings and remove each cushion. Set the cushions aside in a clean, safe spot. Look at the exposed frame for any additional screws or bolts that need to be removed. Keep track of every small part you remove; they’re all necessary for putting the sofa back together later.
Secure All Loose Parts
Collect every screw, bolt, and small component in a labeled container. Check underneath and around the sofa for any parts that may have fallen during disassembly. Use small plastic bags to separate different types of hardware within your container. Tape these bags to the sofa frame or store them in a clearly marked box. This organization saves you time and frustration during reassembly. Taking a few extra minutes now to organize everything properly makes rebuilding your sofa much easier at your new place.
Related Topics: